

The first time I tried to explain dermaplaning to my sister over the phone, she went quiet and then asked, carefully, if I had lost my mind putting a razor on my face at sixty-three. I understood the reaction completely. Before I tried it myself, the whole idea sounded like something for twenty-five-year-olds with skincare budgets bigger than my grocery bill, not something for a retired grandmother standing at her own bathroom sink on a Sunday night, still in her robe, second-guessing every move.
What changed my mind was watching my makeup sit patchy along my cheeks no matter what I did underneath it, no matter how much I spent on primer, and finally realizing that a soft layer of peach fuzz was quietly working against every single product I owned. Dermaplaning fixes that in a way nothing else in my routine ever did, especially once I started using the Schick Hydro Silk Touch-Up tool, but only if you do it in the right order and respect the parts that actually matter. This is the exact routine I built around that same little Schick Hydro Silk tool my granddaughter handed me last spring, laid out step by step, so you are not standing at your own mirror guessing the way I was that first night, package instructions in one hand and a prayer in the other.
Before You Try Your First Pass, Here's the Tool I'd Actually Recommend
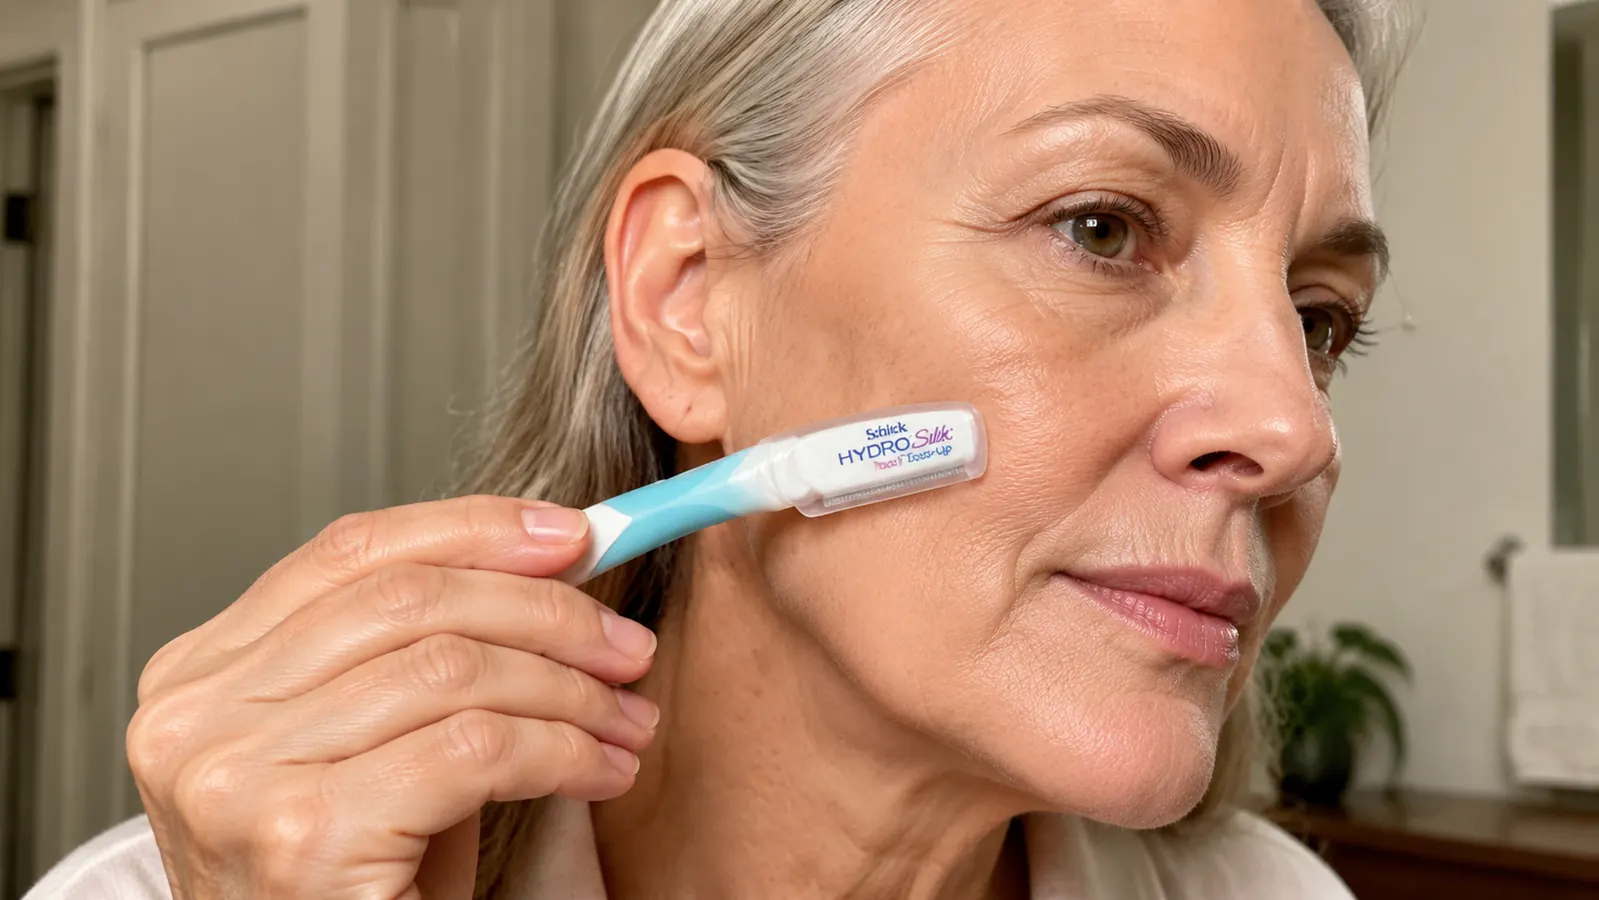
Every step below assumes you're working with something designed for a first-timer's hand, not a straight razor from the drugstore shaving aisle. The Schick Hydro Silk Touch-Up tool has a precision cover over the blade that makes it forgiving for beginners and steady enough for hands that aren't as sure as they used to be.
Amazon Check Today's Price on Amazon →Step 1: Start With a Washed, Completely Dry Face
Skip this step and everything downstream gets harder, so I never do, no matter how tired I am on a Sunday night. Wash your face with your regular cleanser to clear away any oil, dust, or leftover product from the day, then pat your skin dry with a clean towel until there is no dampness left anywhere, not even a shine near your hairline or under your chin. Damp skin drags on the blade and makes it catch instead of glide, which is exactly the sensation that scared me half to death the first time I tried this without waiting long enough.
I give my face a full two or three minutes of air-dry time after towel drying, just standing there while I get my brush and moisturizer ready for later so the wait does not feel wasted. It feels like an unnecessary pause but it is not. Any residual moisture, even the kind you cannot see or feel with your fingertips, changes how the blade moves across your skin, and a fully dry surface is the difference between a smooth, quiet pass and a tug that leaves a faint red streak behind for the next hour.
Do not apply any serum, oil, or moisturizer before you begin, even though it feels counterintuitive when everything else in skincare tells you to hydrate first. I made that mistake once, thinking a little slip would help the tool move more gently, and instead it skated right over patches of fuzz without catching them cleanly, which meant redoing the whole section. Bare, dry, clean skin is the only starting point that actually works here.
Step 2: Set Up Bright, Direct Light and Hold the Tool at a Shallow Angle
Bathroom lighting that is soft and flattering for everything else in your life is genuinely the wrong lighting for this particular task, which surprised me at first. I learned that the hard way, working in my dim evening light the first time and missing entire patches along my jaw that I only discovered the next morning under regular daylight. Now I only dermaplane under my brightest vanity bulb, sometimes with a small handheld mirror angled to catch light from the side too, so nothing is hiding in a shadow along my jaw or under my chin.
Hold the Schick Hydro Silk tool at roughly a forty-five degree angle against your skin, not flat against the surface and not standing up straight like you are chiseling something. This took me three or four attempts to actually feel correctly in my hand, and I found it easier to picture scraping frost gently off a car windshield than to think about shaving in the traditional sense my father used to do at the same sink. Too flat and the blade barely touches anything worth removing. Too steep and you risk pressing harder than you mean to, which is where most beginner mistakes come from.
Rest your other hand's fingertip against your cheekbone or jaw as a brace while you work the tool with your dominant hand. That small anchor point steadies your whole grip more than people expect it to, especially if you deal with any stiffness or mild arthritis the way I do in my right thumb after decades of gardening in all kinds of weather.
Step 3: Work in Short, Downward Strokes in the Same Order Every Time
Start with your cheeks, since they are the flattest, most forgiving surface and the easiest place to build real confidence before you move anywhere trickier. Use short strokes, no longer than an inch or two at a time, always moving in the direction the fuzz grows, which for most faces means downward and slightly outward toward the ear. Never go over the exact same patch of skin twice in one session, even if it feels like you missed a spot along the way. Move to a fresh section instead and come back to any stubborn areas on the following week's pass, not the same night.
After your cheeks, move on to your jawline, then the small area above your upper lip, which tends to have the most noticeable fuzz on most women my age and the area people ask about most often when I describe this routine. Save your chin for last, since the skin there sits closer to bone and benefits from a noticeably lighter touch once your hand has already settled into a steady rhythm built up from the earlier, easier strokes.
Keep the whole session under ten minutes, start to finish, including any pauses to check your work in the mirror. Once you know the order and the angle by heart, seven minutes is plenty, and rushing past that mark usually means you are pressing harder out of impatience rather than working more efficiently through the remaining sections. I set a small kitchen timer the first several weeks just to keep myself honest about not lingering too long over one spot, second-guessing a pass that had already done its job.

Step 4: Know the Areas to Go Slow and the Areas to Skip Entirely
Never bring the blade anywhere near your eyebrows, eyelids, or the delicate skin right under your eyes, no matter how tempting it is to smooth over that area too. Stay well clear of any mole, skin tag, or raised spot, and if you are not entirely sure whether something counts, treat it as off-limits and simply work around it instead of guessing. These are not areas where a slightly imperfect stroke is forgivable the way it might be on a plain, flat cheek.
Go especially light where skin sits close to bone, along the jaw and the bridge of the nose in particular, both spots where there is almost no cushion underneath. My one and only red mark in months of doing this happened right on my jawline, from pressing with the same pressure I had used minutes earlier on my softer cheek without adjusting. It faded within the hour and never happened again, but it taught me clearly that bony areas need noticeably less pressure than fleshier ones, not the same amount out of habit.
If you have active acne, a rosacea flare, or any condition your dermatologist is currently treating, skip dermaplaning entirely until your skin has settled and you have checked with them first, even if you are eager to start. This is a maintenance habit meant for calm, healthy skin, not a fix or a workaround for skin that is already inflamed, broken out, or irritated.
Step 5: Moisturize Right Away and Protect Your Skin the Next Day
The moment you finish your last stroke, your skin is going to feel unusually smooth and a little more receptive than usual, so use that window well instead of wandering off to bed. I apply a heavier layer of moisturizer than I normally would right after, pressing it in gently rather than rubbing it around, and I skip anything with retinol or exfoliating acids on the same night entirely. Freshly dermaplaned skin does not need an active ingredient added on top of what you just did to it.
Sunscreen matters more than usual the next morning too, since removing that top layer of fine hair and dead skin cells means your face is a little more exposed to sun than it was the day before, even indoors near a window. I make a point of a proper, generous layer of sunscreen the morning after, every single time, no exceptions, even on cloudy days when it is tempting to skip it altogether.
As for when you actually see the payoff, do not expect fireworks the first time. My first pass left my skin smoother under my fingertips but the visual difference only showed up under a magnifying mirror. It was around the third or fourth week that my foundation started going on with noticeably less product, sitting flatter across my cheeks instead of catching on texture the way it used to by midafternoon. By week eight the routine felt automatic, and the glow other people started commenting on was really just my regular moisturizer finally able to sit on smooth skin instead of fighting fuzz for space.
What Else Helps
Once a week is enough for most people, and I would resist the urge to do this more often even on weeks your skin looks fantastic right after a session. Give your skin the full week to recover and regenerate before the next pass, rather than reaching for the tool again out of habit. Retire each Schick Hydro Silk tool after three or four uses rather than trying to stretch it further to save a little money, since a dull blade tugs instead of gliding and that is exactly when irritation shows up.
Keep the rest of your routine simple on dermaplaning nights, a gentle cleanser and a good moisturizer are enough, and let the tool do the work it is actually built for instead of layering on five other products at the same time and undoing the whole point of a quiet, simple habit. And be patient with yourself the first couple of sessions. Every single woman I have talked into trying this has said the same thing I did, that the first attempt felt more nerve-racking than it needed to, and every one of them, myself included, was doing it confidently by the third week without a second thought.
It was never about the razor. It was about finally giving my skincare products a smooth surface to actually land on.
Ready to Try Your First Pass Tonight?
This is the exact three-pack tool I use every Sunday night, the precision cover made all the difference for a first-timer's hand. Check today's price before you get started.
Amazon Check Today's Price on Amazon →